Organic Seeds – How to Save Money by Starting Your Own Seeded Plants!

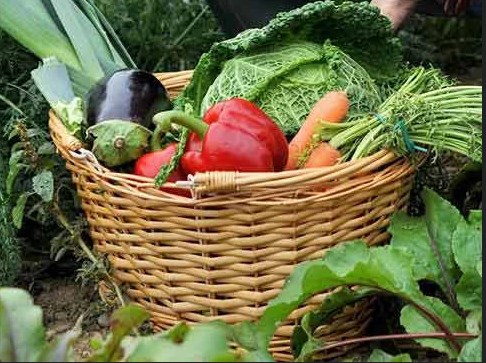
Organic seeds come from plants that strictly grow without the use of chemical fertilizers and pesticides. Their production prohibits the use of genetic engineering, sewage mud, and irradiation during seed harvesting. For seeds to certified as organic, they must follow specifications and regulations outlined by the United States Department of Agriculture’s National Organic Program.

Organic farming refers to food production through techniques that are verified by a third-party inspector. Organic production integrates farming practices such as biological and mechanical farming aimed at conserving biodiversity and promoting ecological balance. Organic production prohibits the use of chemicals to control pests and genetic engineering. The seeds are produced in organic farms where harvesting of banned substances is not allowed. According to USDA’s regulations, a farm is classified as organic if there has been no harvest for prohibited substances in the past three years. According to the US Department of Agriculture’s National List of Approved and Prohibited Substances, seeds are organic if:

They are chemical-free

The parent plant for the seeds must have grown organically. After harvest, the seed must not undergo any chemical treatment. Before organic farming gained prominence, chemical-free seeds were limited. Currently, chemical-free seeds for most valuable crops are widely available in large quantities. In cases where the seeds are not available, the USDA allows farmers to refer their produce as organic provided, they adhere to the organic regimen.

Non-GMO

For seeds to be organic, they must not be genetically modified. GMO seeds have their DNA scientifically altered to increase productivity and resistant to diseases.

The seed must be untreated

Non-organic seeds are treated with anti-fungal and anti-bacteria pest to give them the ability to fight seedling diseases after germination. Untreated seeds that are grown under intensive chemical regimen cannot be considered organic.

Benefits of organic seeds

Healthy people and environment

Organic farming and organic seeds ensure reduced use of synthetic chemicals and pesticides that are harmful to the environment and human beings. Conventional seeds are created in chemical-intensive environments. Farmers and consumers often fail to consider the detrimental effects of traditional seeds and their products, thereby putting their health at risk. These seeds also require more pesticides and chemical fertilizers. The application of chemicals and pesticides in conventional seed production leads to environmental pollution.

Promote organic community

The expansion of seeds of the ecological system have led to the growth of the diversity of stakeholders. More groups of people are involved in promoting organic food production. For example, more retailers and food organizations are included in the evaluation of market gaps for organic food and seeds. Some food companies have also sponsored ecological breeding projects intending to promote organic food production desired consumers as well as addressing economic challenges to organic farmers.

Reduce corporate control.

Seeds produced organically reduces farming’s reliance on industrial seeds produced on intensive chemical farms and proprietary control. It provides economic opportunities to farmers who produce these seeds on their farms. The farmers have a chance to sell their seeds, reduce input costs and financial risks since these seeds have adapted to their farms.

Things That You Should Know About Best Garden Seed Tips

The entirety of your garden seed, regardless of whether it is for a blooming garden or vegetable garden, is ideal whenever acquired from a truly dependable source. It would be best if you had the garden seed to give you the perfect yield and the prettiest blooms ever. Your seeds ought to be acquired from an organization that has a decent notoriety and has been entrenched for a long time.

Numerous vegetable seeds will develop well and give you a decent harvest on the off chance that you can plant them straight into worked soil in slopes or lines. The provisions that you are going to requirement for a vegetable garden incorporate a garden hose, garden rake, garden trowel, vegetable seeds, scoop, and a watering can. First, be certain your outside temperatures won’t be dropping to the freezing level; if the seeds freeze, they won’t endure. The vegetable seed bundles will give you the data concerning when you can begin planting in your general vicinity, how profound the seeds should be placed, how far separated the seeds ought to be, and the best strategy for delivering extraordinary outcomes.

On the off chance that you plan on planting the seeds in lines, you have to make a few channels with the utilization of a garden cultivator. Every one of the channels should be as profound as prescribed by the seed bundle for that vegetable. As a rule, the bigger the seed, the more intelligent it gets planted in the dirt. The little carrot seeds should be around 1/4 to 1/2 inch down while the bigger seeds, for example, beans, should be planted a decent two inches down. Spot the seeds in the channel at the suggested separation separated, at that point spread freely with the rear of a rake or with your hands. Pack that column of seeds with the posterior of your rake enough so the breeze won’t overwhelm the dirt. Water completely yet utilize a garden hose or watering can that is furnished with a fine-shower.

For slope, planting, accumulate your dirt to shape a hill to a 3 to 4″ tallness and 12 to 18″ width. Your seed parcel will most likely tell you high and wide the slopes should be for planting. You can utilize your finger or a stick to make a gap into the focal point of the hill as profound as prescribed. Supplement 2 or 3 seeds into the difference, spread them with the dirt, and press down only enough to ensure the dirt contacts the seeds well. Thoroughly water the slopes a similar path as though you planted in lines.

In many cases, it very well may be smarter to plant assortments of blossom seed inside and afterward transplant them to the blooming garden after the last ice. The time required before transplanting outside relies upon the blooms you pick. This data can be found on the individual seed parcel or in a seed inventory. A few packages guide you through planting inside 6 to about two months before the last ice. A few seeds, for example, zinnias or universe, can be planted legitimately outside; however, to get a solid start, you can plant them inside first to transplant later. Geraniums and licorice plants may require up to twelve weeks before they start growing.

The fundamental explanation behind beginning seeds inside is to help germination by utilization of warmth and water and seed development with the assistance of develop lights. You can help forestall “damping-off” with legitimate seepage and air course; this airflow should be possible with an electric fan blowing over the dirt surface tenderly during the daytime. It would be best if you began “solidifying off” your delicate seedlings seven days to 10 days before planting outside. Quit treating, chop watering down to a large portion of the sum, keep then in a cooler inside space, start letting them get some immediate daylight, and acquaint them with outside temperatures. You can begin by putting the plate outside for about an hour during the early afternoon and increment step by step the time spent outside. You don’t need them out when it is cold, in overwhelming precipitation, strong breezes, and bring them inside during the night.

Before you buy any garden seeds, get some garden seed inventories and do some perusing to see the various assortments of bloom seed and vegetable seed bundles that may intrigue you. You may even need to attempt some that you have never known about, and it may go out just as you would prefer. Make sure to utilize dependable sources when you buy your garden seed.

How To Get Hybrid Seeds From Seed Company

Hybrid seeds will be seeds that outcome from the cross-fertilization of at least two distinct kinds of specific types of plant. The seeds taken from this organic product will contain the qualities of both tomato plants. At the point when these seeds are planted the following season, the subsequent tomato plant and organic product will exhibit qualities from both the Neptune and the Stupice Tomato plant. This training is intentionally done to gain positive attributes from discrete plants and consolidate them into one plant.

If this subsequent plant grown from your hybrid seed shows the positive attributes that you would need in a tomato plant, you would presume that sparing the seed would be a smart thought. You could plant these seeds next season and get similar plant attributes again, etc. season after season.

Anyway, this isn’t valid. Hybrid seeds don’t breed genuine. Hybrid seeds are the aftereffect of intersection two genuine rearing guardians. These hybrid plants will perform superior to anything their parent plants, yet any seed spared from these hybrid plants, when planted, will have eccentric results. A portion of the plants may do well as the hybrid plant did. Some will return to the qualities of either parent plant. Some will show qualities of prior progenitors down the line, and some of them will even be sterile.

Hybrids are acceptable on the off chance that you claim the parent seeds. That way, you can keep the parent lines going in detachment and afterward cross some of them every year, delivering increasingly hybrid seeds to grow your harvests with. If you don’t have the parent seeds you’re left with purchasing new hybrids consistently.

Regardless of whether you do have the guardians, it pretty works concentrated work. You have to grow and keep the distinctive kind guardians confined from one another in two separate removed regions to keep up that they breed genuine. In another inaccessible and different region, you have to cross-fertilize the two guardians with one another to deliver your hybrid seed for the following year. In one more inaccessible and separate region, you have to grow the real hybrid plants that you intend to gather from.

This takes a ton of land, a ton of time, and a ton of upkeep and care. Regardless of whether you’re a home gardener or a considerable scale rancher, most essentially don’t have the opportunity or assets to do this. So we are left to depend on the enormous corporate seed growers to supply us with hybrid seeds. Get the best seed from the seed company.

Hybrid seeds do have benefits else they wouldn’t be near. Hybrid seeds are intended to build a rancher’s net revenue by expanding his harvest yields. Throughout the year’s seed organizations have created the hybrid seed to grow crops that will have significant returns, sickness opposition, uniform size, and shape, oppose harm and keep going quite a while before turning sour.

Hybrid and non-hybrid seed both have their place, and you can contend, which is better; however, it indeed relies upon what you’re searching for. On the off chance that you will likely attempt various assortments and spare the seed to utilize again one year from now at that point, go with open-pollinated heirlooms. In case you’re searching for high return and a long timeframe of realistic usability, and you would prefer not to spare the seed at that point, go with hybrids.

Why You Should Learn About Coconut Coir?

Building raised beds for a nursery is one of those employments that is a great deal of difficult work to begin in return for quite going great, not far off. You have unlimited authority over what sort of soil you put in there, and your back will thank you plentifully when it is slumped over pulling weeds a small amount of the time it would be in a customary nursery bed. In any case, you need to contribute the work forthright – evacuating grass, diving into existing soil a touch of, purchasing materials and building the beds, and afterward filling it with the secret sauce.

We as of late fabricated a few new raised beds, and when it came time to fill them, I was eager to utilize all the high manure we’d had accumulating for the most recent year. That, combined with some compost and a little topsoil, went far, yet there was still some space to fill in the new beds.

I chose to attempt coconut coir, something I’d heard a ton about. It’s an natural item made totally from coconut husks, compacted into a thick block. It’s pH unbiased and doesn’t contain supplements of its own, so it doesn’t upset the pH of the dirt you add it to, yet when joined with some super soil like what I had in my beds, it goes about like a dirt correction, improves seepage, and holds dampness (something you’ll be cheerful about when those prolonged droughts come in the late spring).

It likewise grows progressively detailed, more grounded root frameworks and holds supplements and bit by bit discharge them to the roots. It’s infection safe and doesn’t contain weed seeds.

Coconut coir is produced using the coarse filaments removed from the sinewy external shell of a coconut. Maybe the best part is that it’s a 100% characteristic and sustainable asset.

I began with two or three 5kg blocks, which is light thinking about how shockingly far they go, and absorbed them water for 20 minutes or something like that. The headings state to utilize warm water, however, I used the virus water from the hose and separated the blocks with a spade a bit, and it worked fine.

It was astonishing to see that the blocks had absorbed all the water and extended to each top off almost an entire tub! It holds 8 to multiple times its volume in water, which is an or more when planting yet also when watering later on. The final product is a thick, rich-looking medium that is fit to be blended in with soil. We utilized the coir in our raised beds and handed it over with the remainder of the fertilizer, dirt, and compost we had in there as of now, and afterward planted immediately. I feel like there’s very little I could do to make this dirt any better at this point!

The following day we chose to utilize a portion of the extra coir as mulch in one of the effectively planted beds. We simply laid the coir in a thick cover directly over the dirt and settled it in around the plants- – simply like with bark mulch. The outcome was extremely decent looking, and a reward to this technique is that we can turn it under with the dirt toward the finish of the period and increment the nature of what is there considerably more.

By and by, I’m scared. I believe it’s a superb expansion to my nursery and has such vast numbers of employments, a considerable amount of advantages, and no downsides that I can see up to this point.

Design a site like this with WordPress.com
Get started